Many times, after giving a class or a talk, in a course or in a meeting, I am asked questions not related to dentistry.
Almost always the questions are “How do you do those animations?” Or “Which company creates them for you?”.
The truth is that I create them and based on learning some software design and editing, I can now pull my portfolio of “Animations for presentations”. Already I have more than 70 videos and more than 300 illustrations.
This library has allowed me to publish more than 7 eBooks and iBooks that are in the Periospot Library. They are also very helpful when writing articles about any topic.
This allows me to face many presentations without any problem finding content.
The idea of this article is to be able to teach the basics so that you can also start making your own illustrations and animations.
Before starting I would like to warn you that it is not so simple and can be time-consuming. But I assure you that when you have created your first 10 animations,
Well, let’s get to it.
To start I have to say that the applications I use are those that come in the Adobe Creative Cloud Suite.
Undoubtedly, our friends from Adobe are doing an excellent job in developing applications that we sometimes did not even imagine could be useful to us.
The Adobe Creative Cloud package includes multiple applications, such as Illustrator, After Effects, Adobe Premiere, Photoshop, and Lightroom etc.
In my case, the ones that most use the Creative Cloud Suite are Illustrator and After Effects. With these two I can complete my job.
The Adobe suite has countless applications that you can use for other topics. Undoubtedly worth it for the €34 a month it costs. I recommend that you join the program for Colleges and Universities.
I see this €34 as an investment. I can count numerous times when I have foolishly spent €40dining out or in other useless things. So, for me this money is without a doubt my best investment.
Let’s start by explaining my workflow in a simple way:
1. Create an illustration in Illustrator.
2. Import the vector illustration in Adobe After Effects.
3. Create an animation after creating an
4. Export the animation.
5. Final edition of the video. Last retouching, as required.
It can seem like a lot of steps, but once we have created some animations, we’ll go on to autopilot.
We will start with the first one.
Create an Illustration with Abobe Illustrator.
First, we have to decide what we want to draw. For example, in this case, we are going to draw an alveolus with the tooth inside. In order to do this, I recommend that you look for a photograph or a drawing of something similar, to what you want to design.
In this video, you can see how it is designed.
Step by Step:
1. Create a new document in Illustrator.
2. Drag and drop the image we want to replicate.
3. Start designing over the imported drawing/photo with the pen tool, following the shape of the drawing below.
4. Once we have finished designing using the pen tool, we can also change the color of the image and the thickness of the line and adjust the drawing.
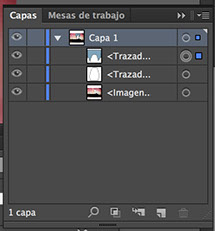
5. Adjust the layers.
6. Release the layers (in sequence). This step is very important so that later we can make the animation in Adobe After Effects. See in the video how it is done.
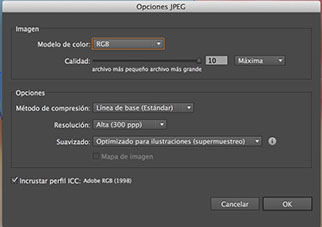
7. Save the image and move on to the next step: Animate in After Effects.
Create animation with Adobe After Effects.
To animate the illustration, we are going to need the illustration we made in the previous step, the After Effects some patience.
Let’s watch the video tutorial:
Step by step:
1. Import the Illustrator file to our new project in After Effects.
2. When importing in the upper left we will see a box with a folder where the layers of our illustration are located.
3. Drag the layers to the timeline.
4. Convert each layer into an editable format. Select the right button and in the create section, the following option appears, (Create> create forms from the vector layer).
5. We then create initial keyframes. This step is extremely important to master as it marks how we want the animation at the beginning, and how it should be moving in time. In the video, you can see perfectly how these keyframes are marked.
6. At the top, we select the pen tool.
7. We then advance the timeline, for example, two seconds, and move the points where we want them. In the video, you can see how I have moved the gum to reproduce a recession.
8. We can also move whole vector objects and in the video, it shows how we move the whole tooth. Once again we mark the initial keyframe and at the end, we move the object to where we want it to move to.
9. Once we have our animation list we select File> Add to the Adobe Encoder queue. Another Adobe application will open, if you have the complete Suite as mentioned above, it will be opened automatically.
10. In the Encoder, you choose the destination of the video and you can play it from day to day. The export starts and we are almost ready.
11. Once we have our video-animation, we go to the last step: Edit the video to be able to customize it in Final Cut or Adobe Premier. I use Final Cut, but if you subscribe to the Adobe Creative Cloud, the video editing application is included.
Last step: Video edition with Final Cut (or Adobe Premiere).
Once we have our raw animation, it’s time to give it the final touch.
For this, we can use either Adobe Premiere (included in the aforementioned Creative Cloud, Final Cut or another video editor that you like.
This part is simpler, and everyone can customise their video as they wish.
In my case, I use Final Cut because for years it has been my video editor, although Adobe Premier is also an excellent editor. Also, if we subscribe to the Creative Cloud we save the €200 that is the Final Cut.
I created a video of the Final Cut edition for you so you can see that it is really very simple.
I have not added music to the video but that is something that you can do without any problem.
To add music, I downloaded it from SoundStripe, which has a huge library of music that you can use across social media. It´s royalty-free music as long as you are su
Conclusions and Final Tutorial
To provide a comprehensive recap, I have included a final tutorial explaining step-by-step the workflow for creating illustrations, animations, and the final video.
Necessary applications- Checklist.
We review the applications necessary for the creation of animations and illustrations.
– Final Cut or Adobe Premiere.
– All the above are included in the Adobe Creative Cloud subscription.
– And some patience.
Finally, if you have any questions or need help, please feel free to send me an email to Periospot@periospot.com.
I will be more than happy to help you.
Ah, and I almost forgot, here the Straumann BLT Implant illustration that you can start using in your animations.