Imagine 10 years ago, on a typical barbeque Sunday afternoon, at home with your family. You’re turning the coal in the grill as you’re talking with your brother-in-law.
Being the visionary that brothers-in-law usually are, he decides to seize the moment and state his predictions of the future:
“Hey! Did you know that, in a few years, you will be able to set up your website and do online marketing without the requirement of any computer skills?”
Surely, upon hearing this, I would’ve been shocked and, I would have started breathing hard and squeezing my beer can until it burst and reply:
“Pass me more wood; this isn’t enough.”

This was how many people would think back in those days when iPhones were rare, Youtubers did not exist, and social networking was a trend that was soon going to disappear.
However, everything has changed, and today we have access to information and examples of people who, starting from scratch, have managed to develop a strong online presence and authority.
The same scenario has taken place in the dental sector.
There are good examples of clinics that perform excellent with online marketing, as I described in this article about the use of the social network to enhance online presence (in Spanish).
Developing online authority can seem impossible or like something we might want to leave in the hands of an agency—which is not a bad idea. But, keep in mind in choosing one aligned with our values and purpose.
Nowadays, exists a wide range of SaaS (Software as a Service) that allows anyone to own and have a website, subscribers, and an online presence—all with a reduced budget.
We can get from 0 to almost 4000 subscribers within a year, as well as grow our email list by nearly 400%.

#1. Bluehost– How to create a webpage in one morning.
Whether you are a person who wants to promote your personal brand, or a company, clinic, or business, you must start by creating and having a website.
It is your cover letter and the very first step.
Nowadays, a web page can be created in less than an hour.
I, myself, set up my wife’s website, without much effort, in one morning.
In fact, this website, Periospot, was set up years ago and needed a programmer that—as you can imagine—cost a good lot of money.
Today, however, we can mount something similar using solutions such as BlueHost which, for € 3.53 a month, allows us to have our own website.
To do this, you have to access to BlueHost and create an account.
Paso 1. Create a Bluehost account.
Once you go on to Bluehost, click on “Get Started”.
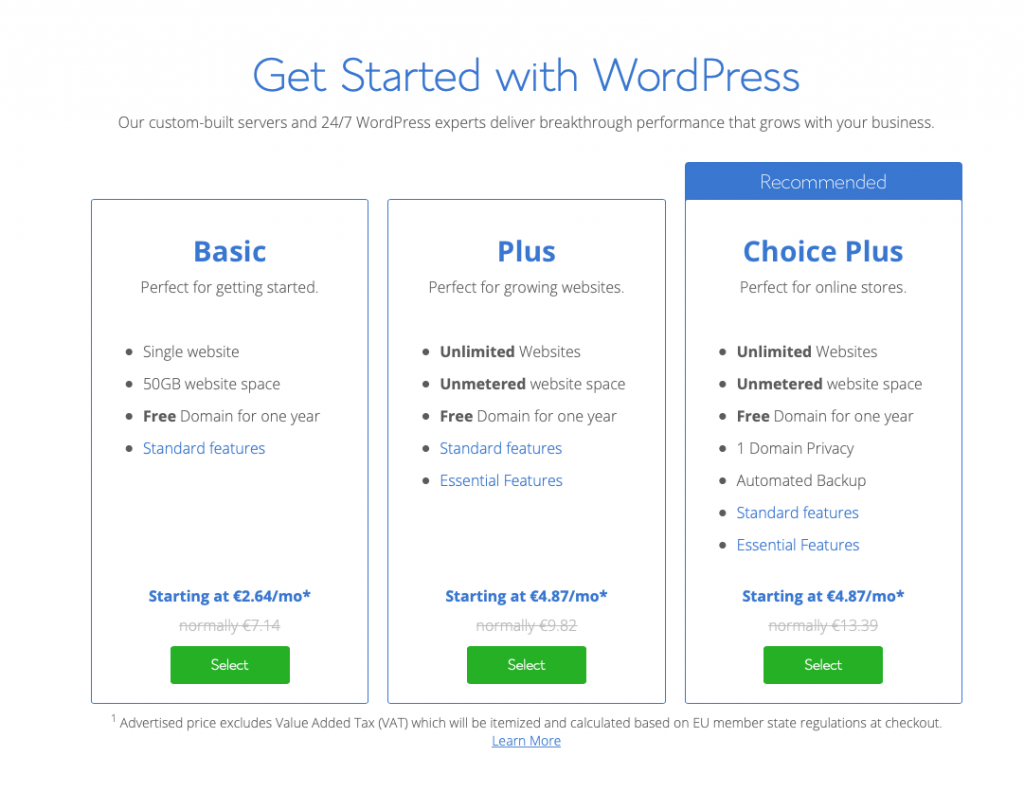
Paso 2. Select a plan.
If you are a beginner, the basic option is more than enough. It costs € 2.64 a month.
Paso 3. Create a domain.
Here, you choose what you’d want to call yourself, or your company. For example, in this case, www.periospot.com.
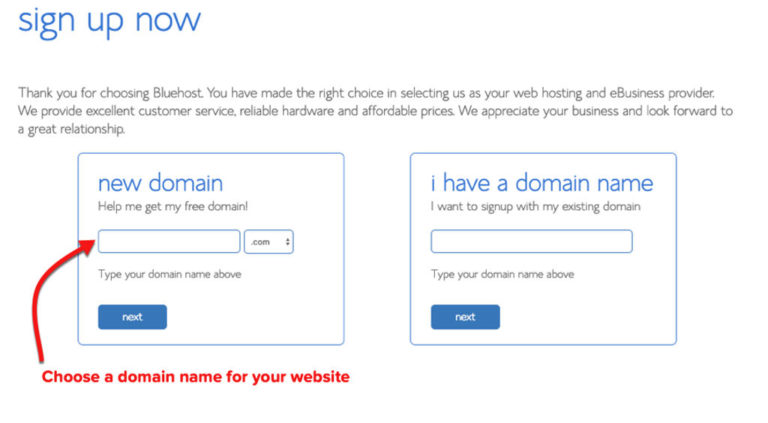
In this step, it is very important to be sure of the domain you want because this will be the name of your website.
I remember the first web page I created (via FTP and with an Adobe program that wasn’t too easy to manage), it was called www.franciscobarbosaimplantology.com.
There was no way to spell it 🤦♀️.
It was undoubtedly a long and intuitive name.
Nevertheless, I learned from my mistakes, and I named my second website Periospot—a shorter name and easier to pronounce.
Much better right?
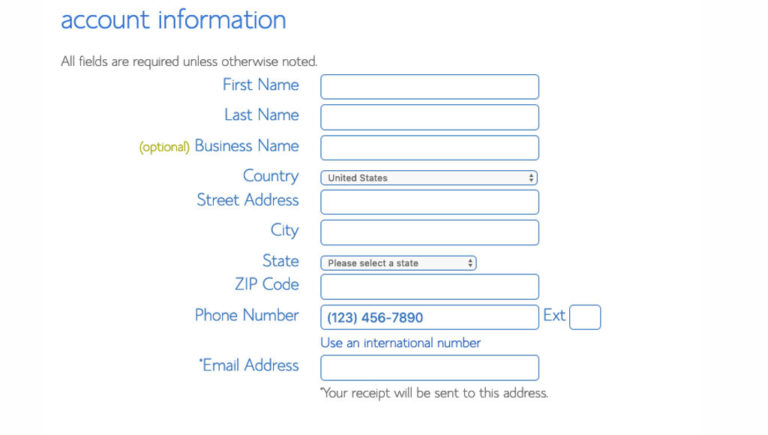
Step 4. Fill in the account information
This step is typical of any online form where you’d need to put in your personal data and payment information.

Step 5. Verify the contracting of the page.
In this step, there are extras that you would have to verify before proceeding (just like when you buy a flight ticket).
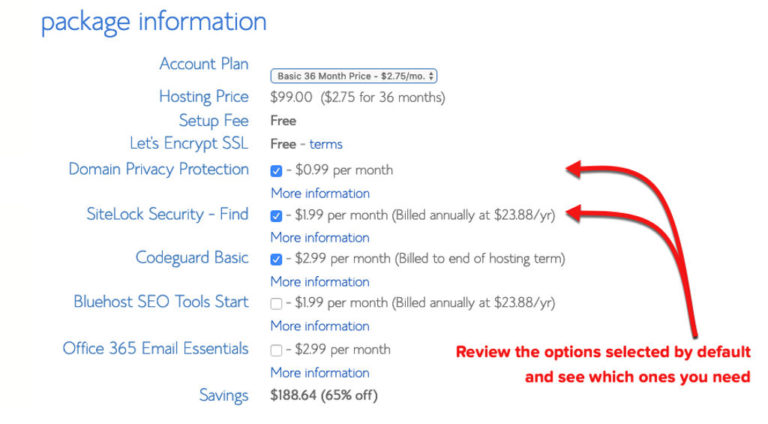
We can consider these extras:
Domain Privacy Protection: A Privacy option, for your page, in order to keep your data private.
SiteLock Security: This option verifies your address, email, and personal data so that if you plan to sell products online, there will be a credibility bonus
Codeguard Basic: This is an option for extra security. WordPress is an extremely safe site; however, nobody is ever safe from a security inconvenience. I’ve had some with Periospot, but thanks God for the backups that restored it without a problem.
Bluehost SEO Tools Start:
Bluehost has a tool that assists in SEO positioning. If you already have an idea of how you are going to position yourself online, this can be expendable.
Once these steps have been taken, you can proceed and log into Bluehost and choose the prefer
I highly recommend WordPress. It is the most intuitive, and some SEO experts state that Google has some sort of preference for these websites.
Step 6. How to install WordPress
Bluehost offers the installation of WordPress in one click.

To start creating a WordPress page, you have to log into Bluehost and under “My sites” click on “Create site.”
1- Select a WordPress template. You don’t need to stress about this because if you don’t like it, you can change it later.
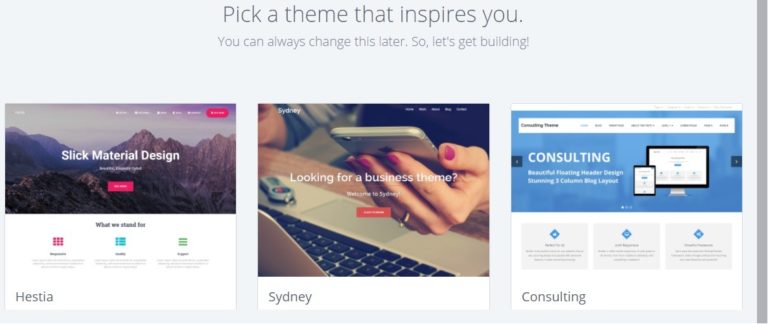
Once you have chosen the template, you must log into WordPress and start assembling your page.

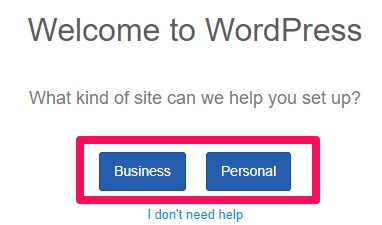
2- Select an option to choose if this will be a Personal or Business page.
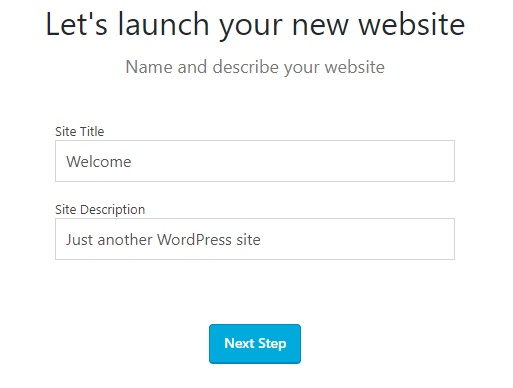
3- Fill in the name of the page and the description. For example: “Periospot” and “Making Dentistry Easy.”
4- Choose if you would want to update your page with new Blog posts regularly, and then select which ones will be seen on the Homepage.

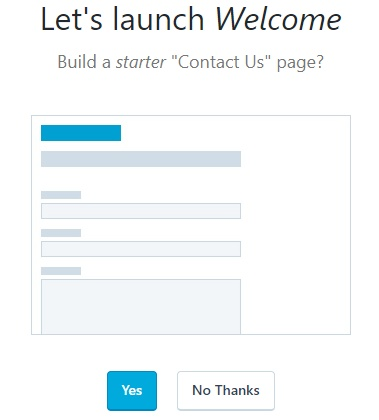
5- Create a basic “Contact” page for your visitors.
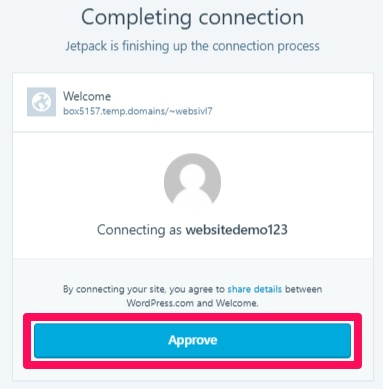
6- Finally, you can connect it to Jetpack. I recommend doing this because it will give you a plus of security and site statistics.

Approve the connection with WordPress.
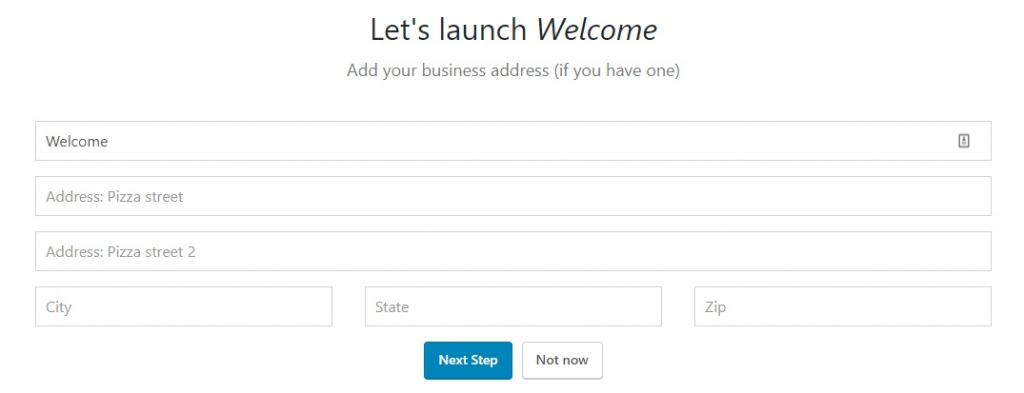
You’re almost there. You’ve just got to add additional information.
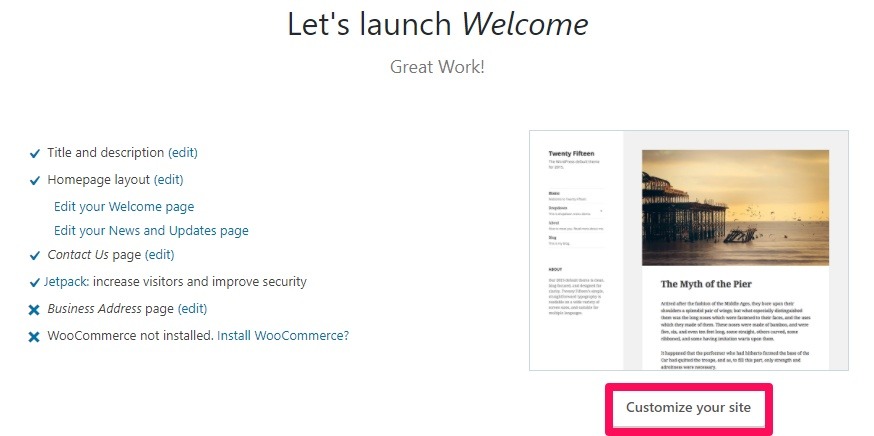
You’ve now got to launch the stylist page. If you want to add or change data on your website, you go to “customize your site.”
7- You can go to the Bluehost Dashboard by clicking on “Bluehost” on the left side of the panel.

8- Once everything is ready and you are happy with the way it looks, click on “Launch” and you will have your online website.

This is a basic step-by-step guide that enables you to set up a web page singlehandedly. You may prefer an expert to do it for you, but if you prefer to do it yourself with a low budget, you can do it.
Although it is true that WordPress has a lot of features, and you can be sure to create blog posts (like this one), one has to dedicate time and effort. Nonetheless, it’s all about learning and taking action!
Dentists usually are tough self-
This video is also of great help.
#2- Start collecting leads or subscribers with Mailchimp.
If you publish engaging content and your audience likes it because it is valuable to them, they will undoubtedly want to hear from you, often.
If you do not have a landing page (which we will cover in point 4), your visitors will go through parts of your website and leave. They may not come back.
To avoid this situation, and for you to have a fluent contact your subscribers, you need to build a platform that saves emails from visitors who want to be subscribed to your page.
This tool is absolutely essential, just like the website, for a very simple reason:
Do you remember MySpace?
Yes, me too! However, what happened to MySpace can happen, today, to Facebook, Instagram, or Twitter.
You can have thousands of followers on social networks, but it is too risky to depend on a platform that can be a fade.
Today, Facebook has started leveraging groups to avoid losing their organic growth.
Hence, your mailing list is going to be your treasure. This mailing list will enable your audience to listen to the news you have for them by a single click on “Send Newsletter.”
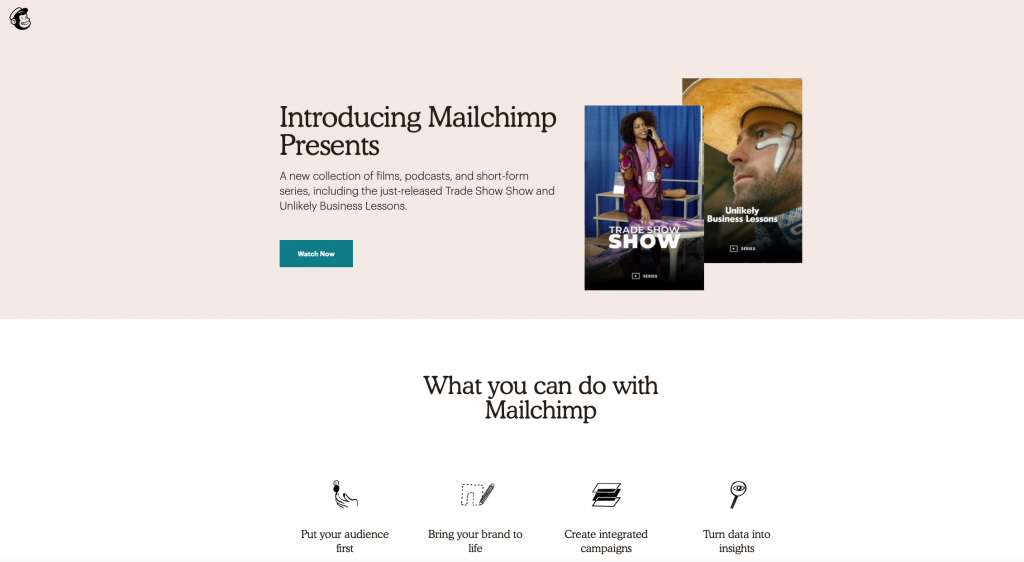
The tool I use is MailChimp, and it is the most famous among small businesses and startups.
Very intuitive and easy to use.
It also allows you to start with a mailing list of 2000 users for free, although this option does not have one of my favorite features—Automatic emails.
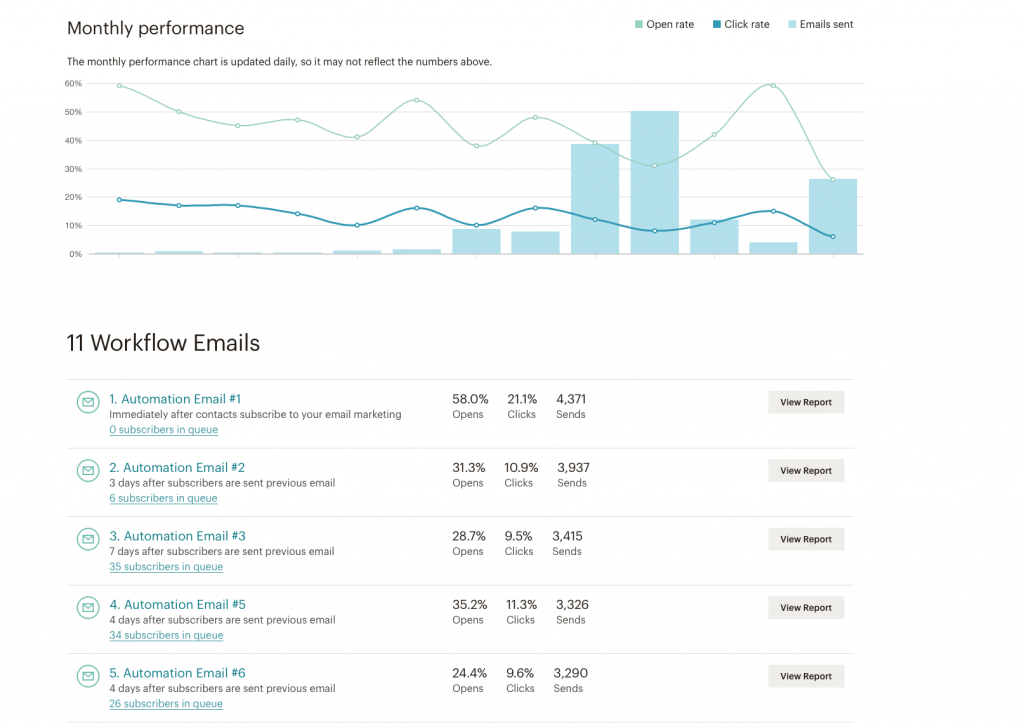
This feature allows you to create a chain of emails for each person who subscribes to your page. This advantage enables you to chain several educational emails, separated in time, to not overwhelm your audience or neither leave them abandoned.
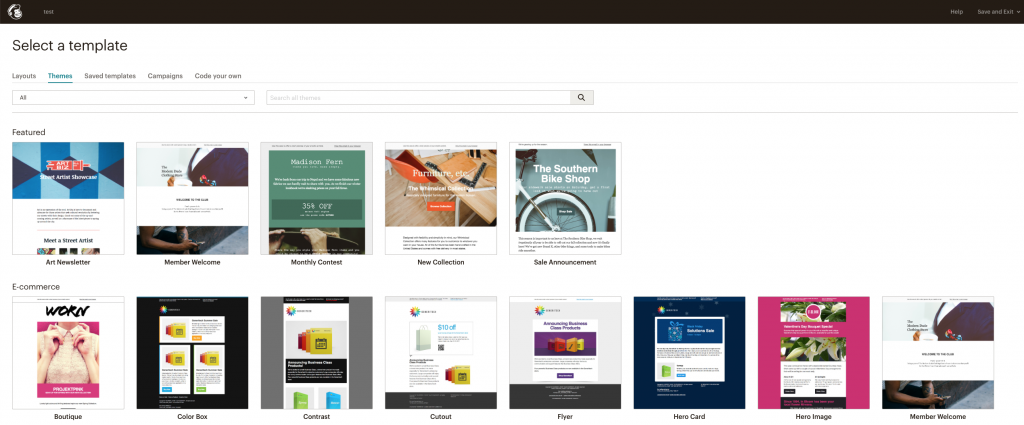
In this link, you have a step-by-step guide to MailChimp, which is a potent tool that offers many templates to send your first newsletters with a beautiful and customizable design.
For € 12 a month, you have the essential services such as automation, up to 500 subscribers, and no email limits.
This video helps us get started with MailChimp.
#3. Subscriber collector – OptinMonster
Once you have your website, MailChimp, and visitors to your website set (Olé), people who consume your content must return whenever you publish something new.
If you do not have any service to nurture leads on your MailChimp with leads, all of this will be useless.
You will have to have a pop-up system that will be activated every time someone visits your website.
OptinMonster is a tool that allows you to install a plugin on your website that displays a pop-up message, such as “if you want to subscribe to our news …” or something similar, every time someone visits your page.
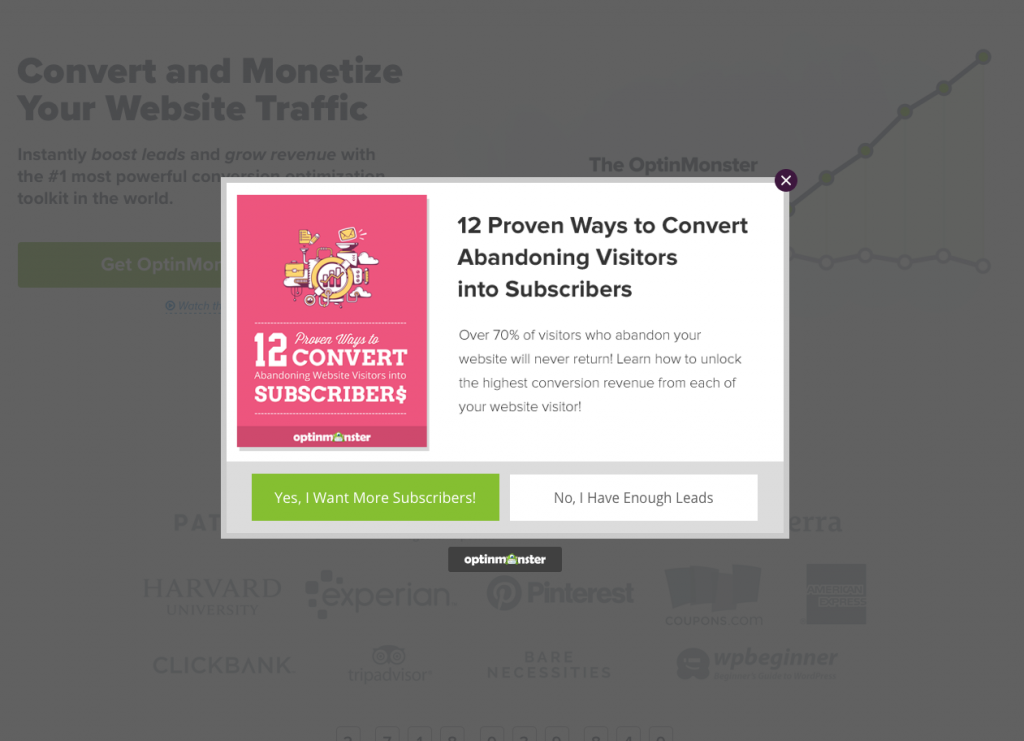
This pop-up can be configured to be activated when:
1- Someone takes xxx time on the web.
2- You reach an XXX paragraph.
3- Someone tries to leave the webpage.
And more pop-up options including a Hello bar.
Keep in mind that this system must be used with caution and should not overwhelm visitors with continuous and multiple pop-ups.
In fact, you should not expect a conversion rate of more than 5%.
In the video below, you can watch a step-by-step guide about how OptinMonster works, and understand how to start working with it.
- Always ensure that you select the GDPR field in the Opt-ins. This ensures that whoever leaves their email agrees to receive your newsletters.
#4. Leadpages– Creating landing pages.
If there is a tool that seems essential to me, apart from Mailchimp, this tool is Leadpages.
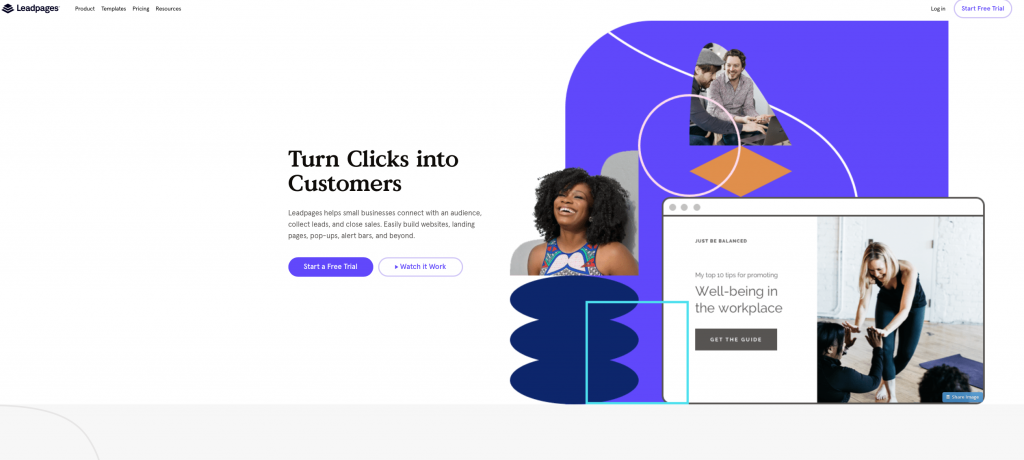
Leadpages is a fast and simple software, and I must say that it is pretty cheap for the outstanding available features.
It creates landing pages in minutes using “Drag & Drop” which makes it accessible to all who do not have computer skills.
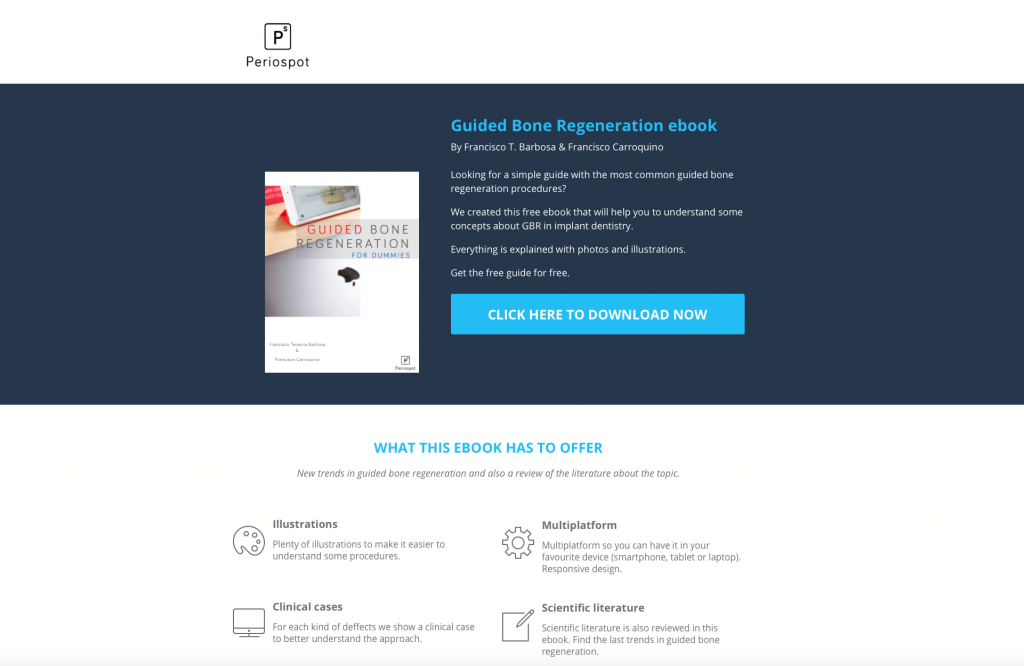
These Landing Pages, like the one I created for Periospot, allow you to give away the content in any format, available for download in exchange for the contact details.
In this video, there is a tutorial on how to create these pages, and how they work.
Besides, it fully integrates WordPress (WordPress has a Plugin to install Leadpages on our website).
It is a potent tool because it has:
– Countless templates to capture leads (webinars, landing pages for Facebook, etc.).
– Solid background since it has attracted more than 20 million leads.
– New features to create Facebook Ads and simple web pages.
A practical example would be to create an eBook on, for example, 10 Tips on How to Maintain and Educate Our Children on Oral Hygiene.
Anyone who visits the page and is interested in the subject would leave their email and receive the eBook in return.
All these captured emails would go directly to your MailChimp. Just connect your Leadpages account to Mailchimp in a few simple steps.
A few years ago, when I started with Leadpages in Periospot, we created an eBook on guided bone regeneration and decided to put it on Leadpages.
The work of creating the eBook paid off well when over 3000 people subscribed within a few days due to their interest in downloading those eBooks.
Today, more than 11,000 people have left their emails in exchange for this eBook.
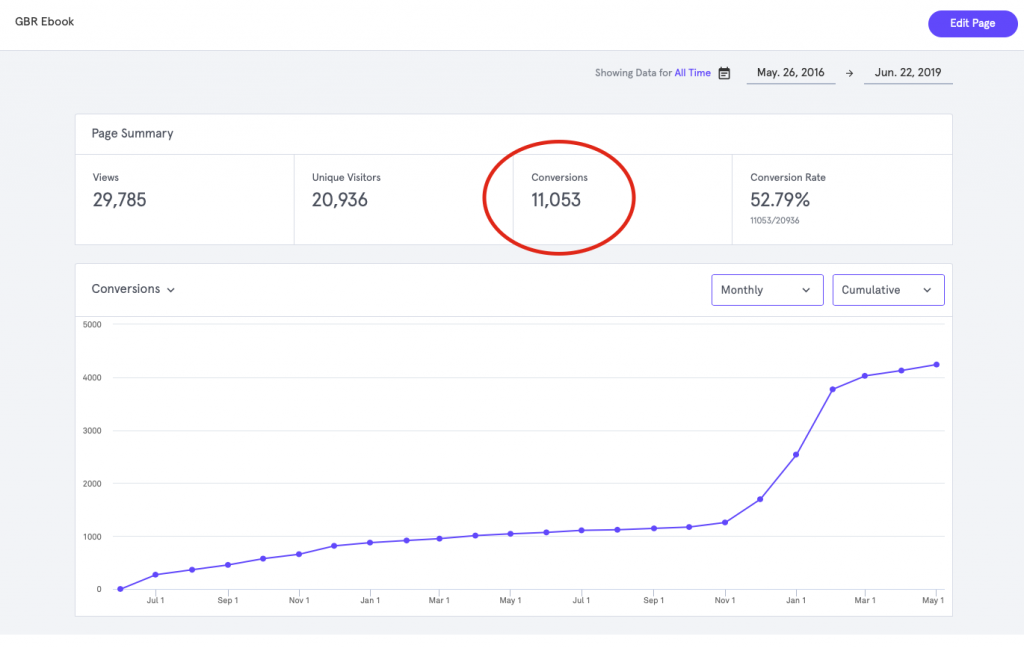
– 11,000 more subscribers.
– A conversion rate of 52%.
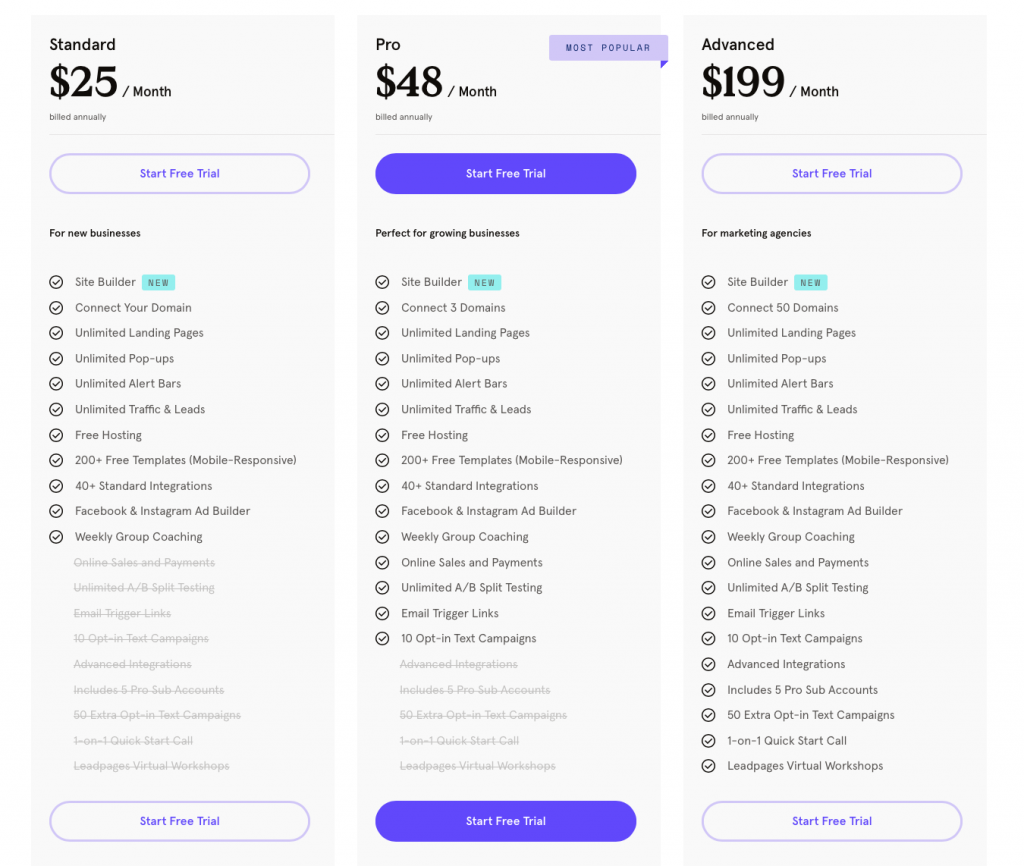
The price of Leadpages is 25€ /month.
#5- Animoto: Creating amazing videos for social networks.
All the tools described so far are intuitive and accessible to all who have limited computer skills (like me).
Animoto is a tool that meets this requirement.
Intuitive, easy to use, and above all, very useful
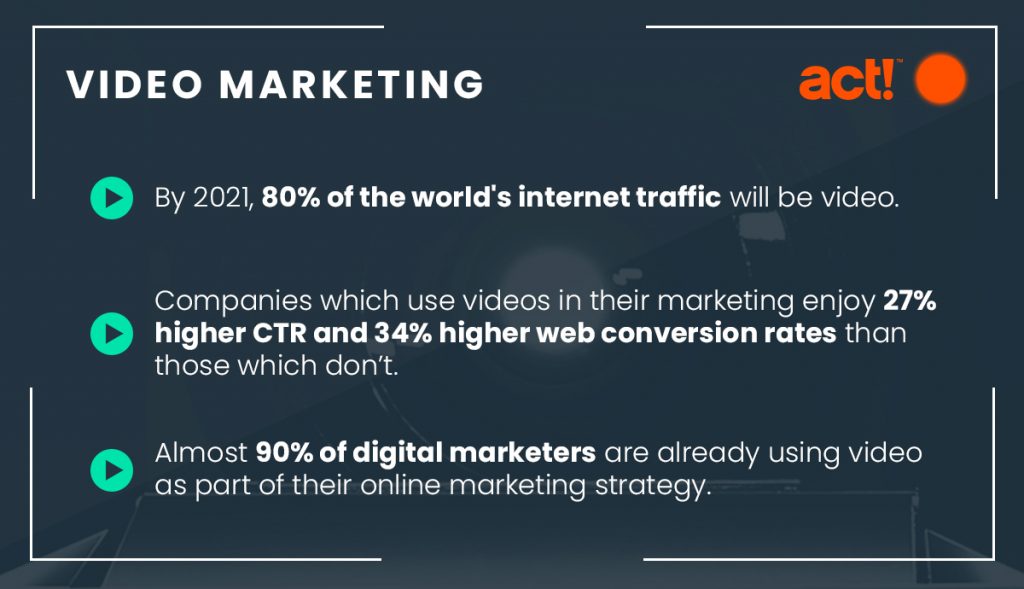
Videos are undoubtedly the type of content that is most consumed on social networks, and one that easily becomes viral. However, not everyone has the ability to edit videos decently and quickly.
In a previous article on Periospot, there is a tutorial on how to edit videos using Final Cut.
Final Cut is an Apple video editor that is used for more advanced editing, just like Adobe Premiere, but both provide good results with a few hours of learning.
Animoto is the tool to edit videos in a few minutes and have an attractive format for social networks.
I have been using this tool for the past 2 years with great success.
Every time I create a video with Animoto, I’ve noticed an increased rate of engagement on my posts on social networks.
It also has several formats, including the square format, which, although it surprises me, is the format with more engagement on social networks.
This video is an example of a video I created for various channels.
There are several templates available that leave your work almost done. You have to drag photos and videos and edit the text.
This video is another example of a video created for social networks using Animoto.
Animoto is priced at 19.99$/month, although in its annual plan (highly recommended) it drops to per year, which rounds up to$ 9.99 per month.
Another positive aspect of Animoto is that it also includes music for videos, although these are very limited.
The best way to get good royalty-free songs is Soundstripe. All Periospot videos have Soundstripe songs.
How many times have you edited a video, posted it on networks and BAM! Blocked… Has your video copyrighted content? 😅.
This issue can easily be avoided by using the various songs available on Animoto.
#6 Creating compelling eBooks. iBooks Author and Adobe Indesign.
eBooks have been mentioned before as a fairly accepted form of content with a high conversion rate.
Surely, some of you have downloaded a Periospot eBook. You will notice that these have a friendly and compelling format.
Basically, for this, you can use 2 programs:
– Adobe Indesign (Mac and Windows).
iBooks Author is an excellent program to make eBooks in an intuitive and easy manner. It allows you to export your file in various formats, such as .pdf.

There are also templates that make life easier so that you do not waste time on designing, sketching, and other tasks more typical of a graphic designer.
Another software is Indesign. This is a very powerful software that allows you to create professional eBooks.
In another article, it was explained how to use Illustrator and After Effects to create animations and illustrations. If you already have the Adobe Creative Cloud, InDesign is included in the suite.
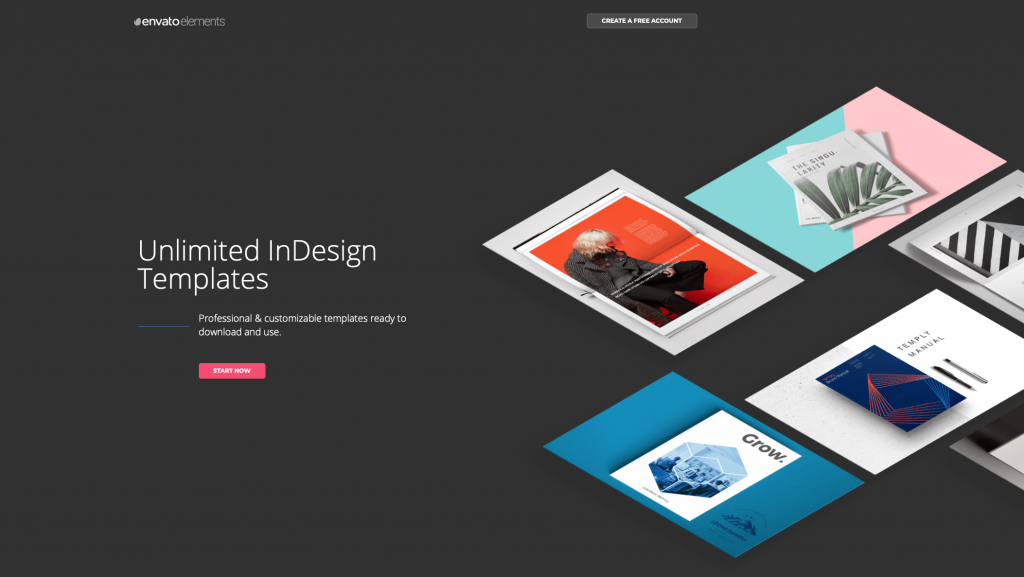
There are many ideas and topics for eBooks, but each author has their own audience, and they have to discover a topic that has the most traction.
Once you create the eBook, all you’d have to do is upload it on to Leadpages, or even sell it on Amazon.
Today anyone can write a book.
– iBooks Author: Free for Mac
– Adobe InDesign: From € 19.66 per month in the Creative Cloud Suite.
Conclusion
In this article, I have described various steps to develop and have an online presence, whether it be for your personal brand, dental clinic, small business, or startup.
The article covers the main points, each of them can be deepened using other tools.
To summarize the points described above:
1. Create a webpage- BlueHost– have your own website—your home.
2. Having your management and communication program, with subscribers- Mailchimp.
3. Having a basic subscriber recruitment tool- OptinMonster.
4. Advanced and more effective lead acquisition- Leadpages.
5. Creating videos for distribution on social networks- Animoto.
6. Creating eBooks using Indesign and I
With these simple steps, you are now enabled to start creating your online audience and presence.
With a budget of € 90 per month, you can start with these basic tools to leverage your digital marketing strategy.
Initially, you can start by prioritizing some tools over others, and allocating a larger budget as you see an evolution.
€ 90 per month is an assumable budget in many cases, depending on your objective and return, although you always have to look at it as an investment, and, above all, use the tools to which you are subscribed to.
The learning curve for these software, in general, is short. I usually follow some classes on Lynda which is where I learn everything that is not related to dentistry.
Finally, if you make good use of these tools, you can be sure to achieve objectives that are set for the short, medium and long term, and during the next barbecue session with your brother-in-law, it will be beneficial for you to carefully listen to all his predictions.
Only some will succeed—be careful if he tells you to buy Bitcoins!
I hope this article helps you, and as always you can send me any questions or suggestions to the email periospot@periospot.com, or comment on this article.


