Root Coverage Procedures, My First Time! 8 Golden Rules on Esthetic Plastic Periodontal Surgery.
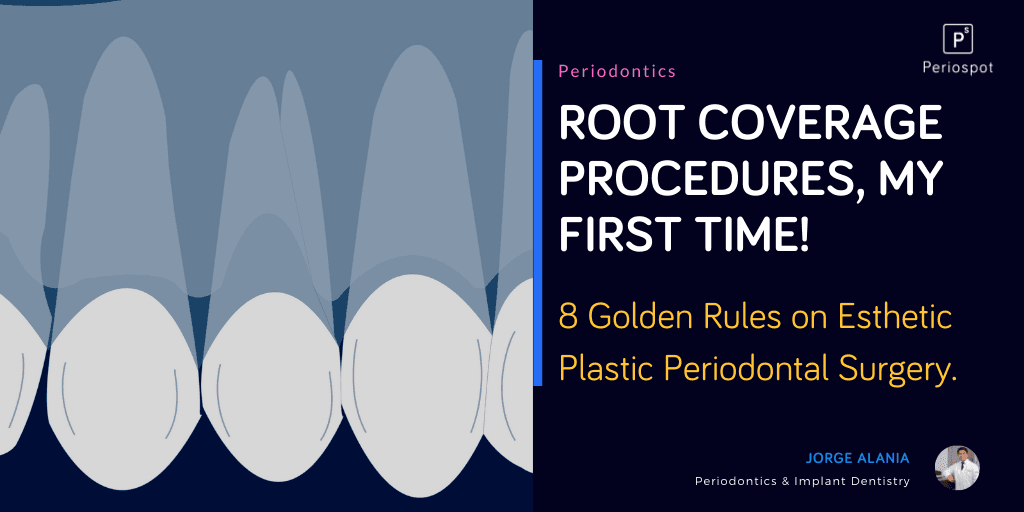
Table of Contents
Related clinical guides
When we dive into the world of periodontal plastic surgery, it is unavoidable to avoid failure during the learning curve. Do not feel discouraged; you should know that it is part of the process.
Remember, those who have never failed most likely they have never achieved anything.
However, what we can do is learn from the mistakes of others. Since the root coverage procedure is a very sensitive technique, this means that it is difficult to execute.
I would like to introduce you to some recommendations whenever you perform your first root coverage procedure.
Obviously, if you decided to step into the surgical phase, it is because you have the proper knowledge of diagnosis and preparation.
1. Choose a single gingival recession in canine or premolar
The first recommendation is definitely to remember that this technique requires developing excellent surgical skills. However, some people have the innate ability and expertise; they need biological knowledge to make the best decision.
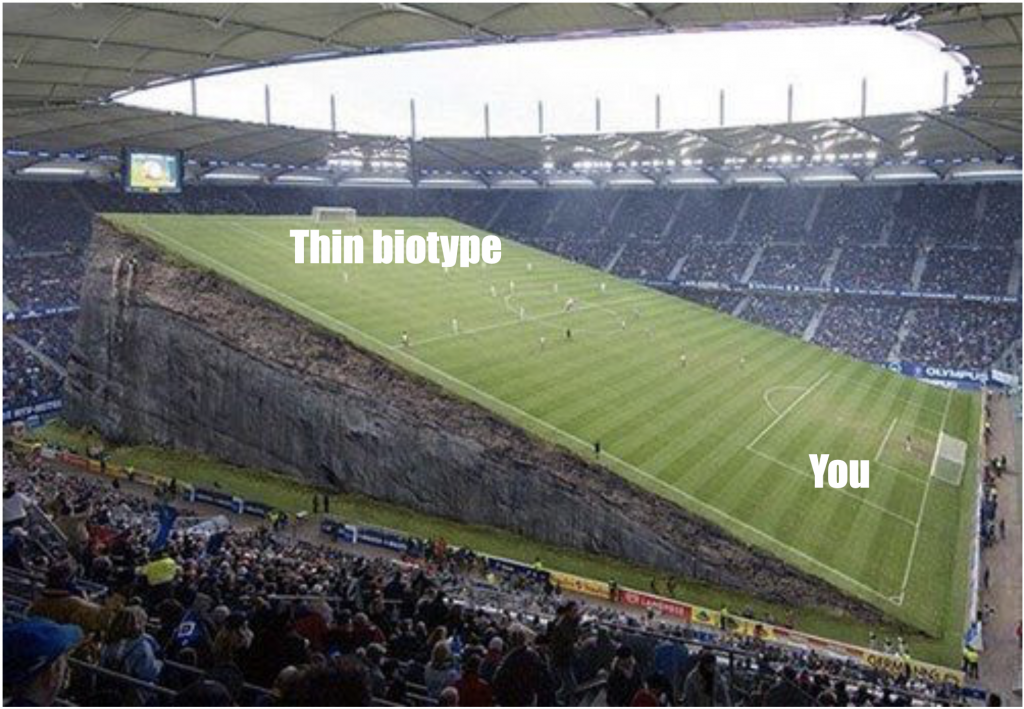
I consider periodontal plastic surgery to be similar to soccer.
Some people have an innate ability to develop techniques with a soccer ball, whereas some people will take longer to develop their techniques.
Mind you, this means that sooner or later you will finally be able to achieve them, as discipline always beats talent. So do not try to be like Maradona and try to perform your first surgery with a tunnel technique for multiple root coverage in a thin phenotype, moreover without having the appropriate instruments and materials.
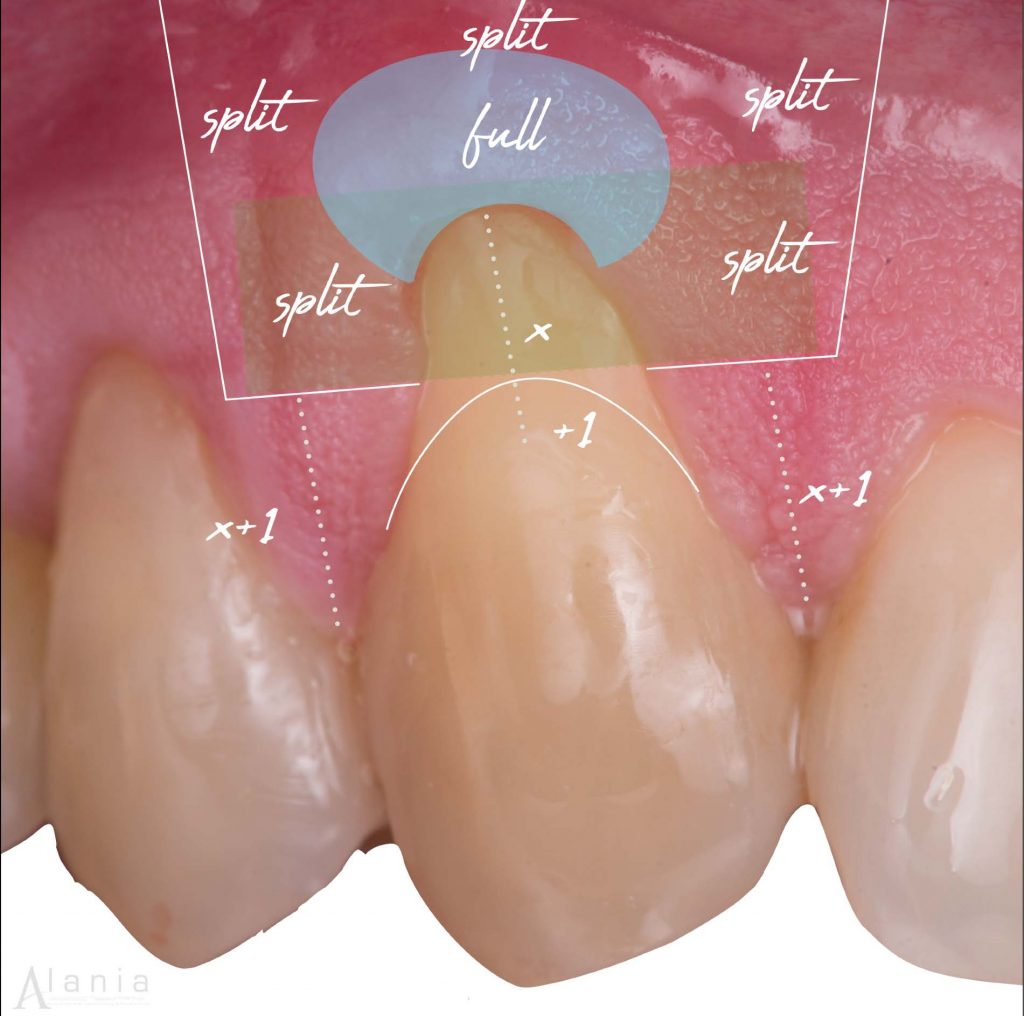
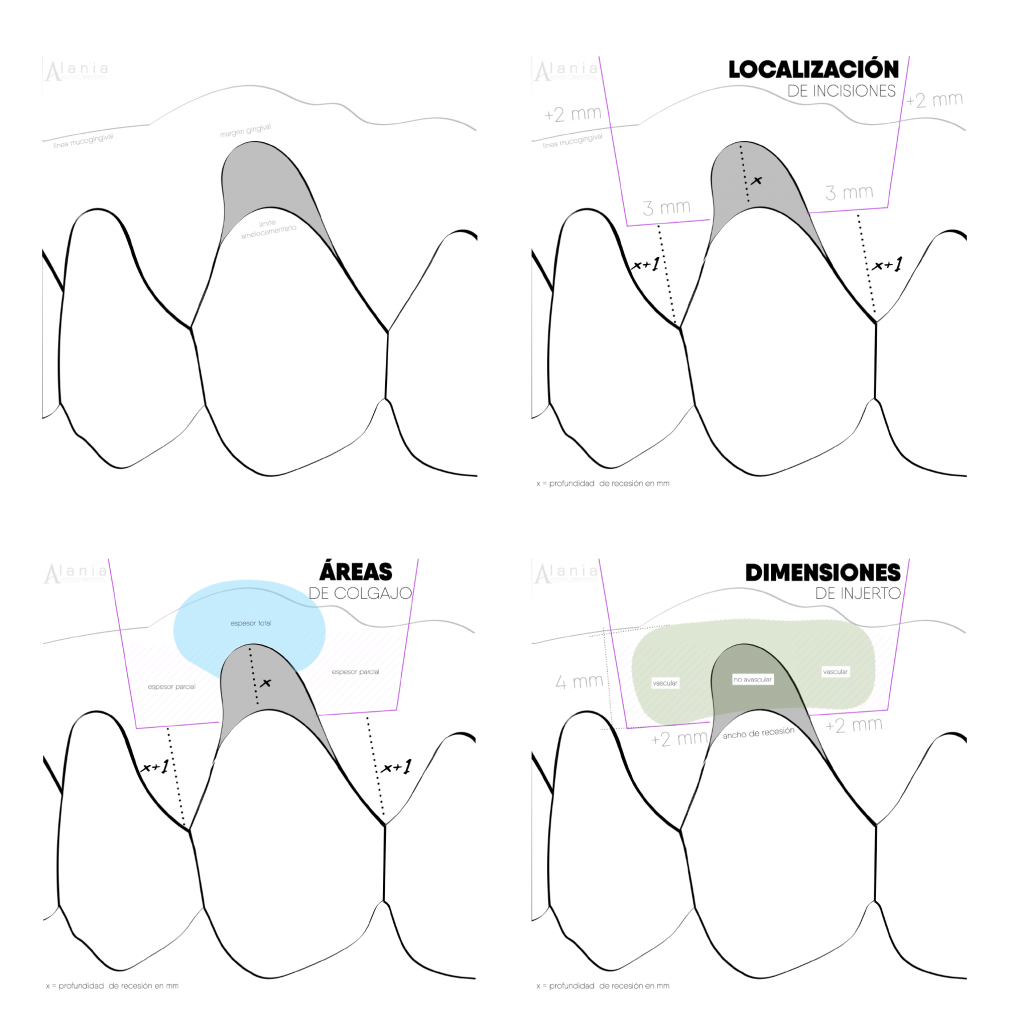
2. Choose an open-flap technique
One of the most important points is to achieve a tension-free flap. It is easier if you choose a technique that includes vertical incisions (De Sanctis) in your first surgery, as this avoids a recession within the aesthetic region.
Another critical point is that you can see what you are doing with an open flap: flap thickness, periosteum, muscle insertions, etc. Besides, you will be able to understand better all the theoretical knowledge that you have gained by combining it with practical-clinical experience.
Envelope or tunnel techniques offer significant advantages for the healing process as well as for post-operative pain, but in my opinion, they require more training.
Later on, you can master them and decide which technique to choose for each clinical case. Developing clinical judgment is a process that requires knowledge and experience, both of which are developed over time.
3. Choosing the right Instrumental and appropriate material
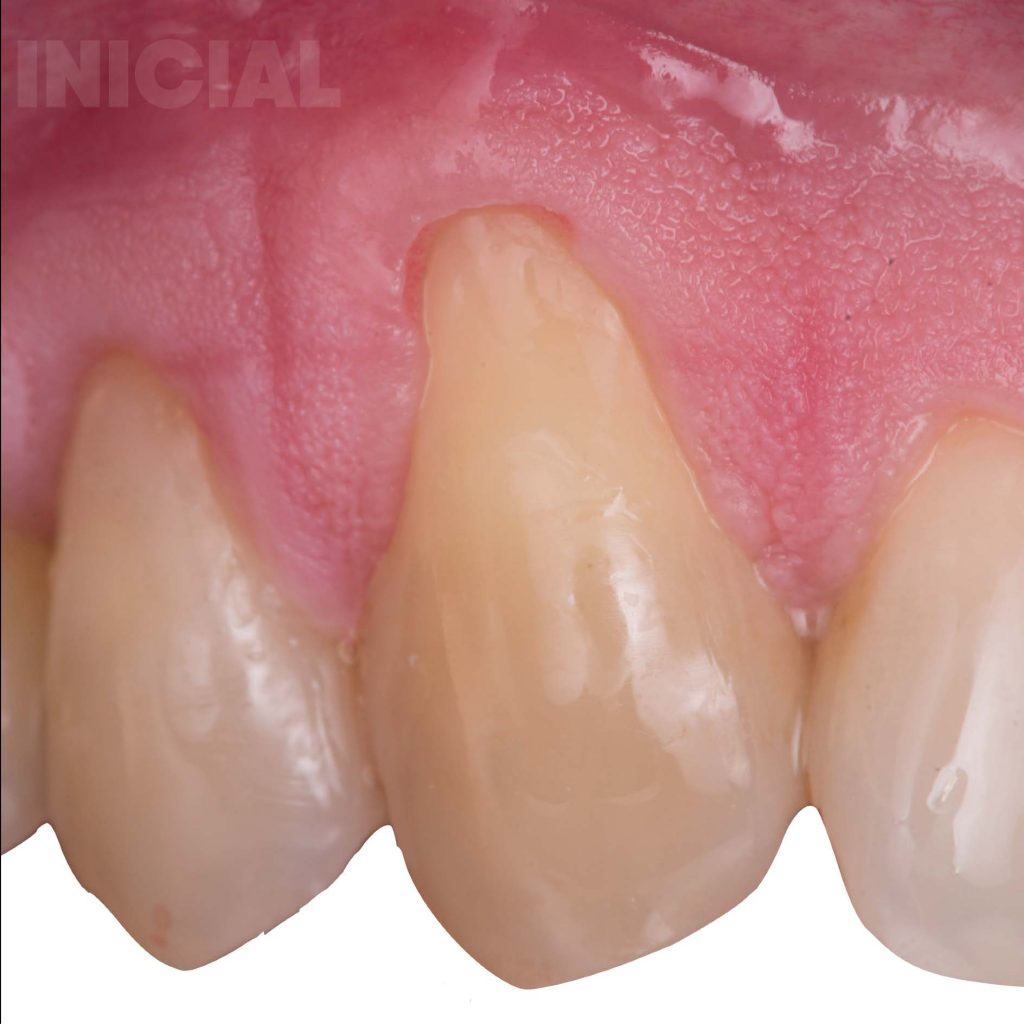
You should be aware that gingival recessions are prevalent in thin phenotypes (<0.8mm), so your first surgery will probably be performed on these conditions. Many times I have heard the following: “I don’t live in Europe or the USA to have access to all of this equipment.”
I’m not talking about any brands, but purchasing good cutting and suturing instruments, which I consider to be the most important thing in the entire surgical kit. Search for contact for ophthalmic supplies; you will find many surprises. It is true that dentistry is not very developed in some countries. Perhaps our profession is not considered fundamental; perhaps an eye is more important than a tooth.
Wherever you are, I don’t think ophthalmologists are operating with a 15 “made in somewhere” scalpel or suturing with 4/0 black silk.

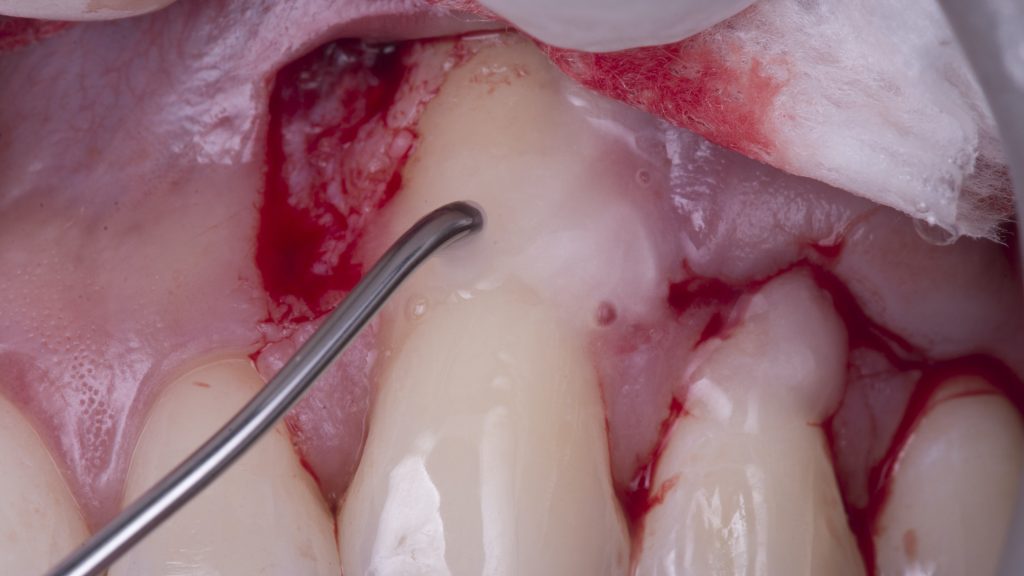
4. Be aware of the anatomy
Review the case many times. Despite the fact that we try to describe the techniques in as much detail as possible and to standardize them so that anyone can reproduce them, we can make mistakes because of anatomical variations, or some anatomical references are not taken into consideration.
For example, when you are experienced enough by performing surgeries on upper canine several times, you will know that there is a depression after the mucogingival line; you can feel it with your finger if you touch just the angle of the nose.
The literature describes that the first incisions to partialize the flap are parallel to the tooth, but if you continue parallel, it is very likely that you will suture the flap and you have to reprogram your surgery, making up a good excuse like a blackout or something similar!
In fact, depending on the size of the fenestration, this can be real and no longer funny, so remember to go slow and give the correct angulation according to the anatomy of the site where you are performing the surgery.
5. Root conditioning
Condition the root’s surface If there is a non-carious cervical lesion (LCNC) with a pronounced step, you should treat it. I only remind you because doing this procedure the same day of the surgery takes time, and you know that this reconstruction is done at the clinical level of the amelocemental limit on the place of the maximum root coverage.
It is true that getting an EDTA and amelogenins is difficult because it is not available in all countries, but if it is due to costs, I recommend that you at least get an EDTA.
Chemical conditioning does not influence coverage, as it has been demonstrated by systematic reviews; however, everything that is not statistically significant does not mean it is not clinically significant. For me, chemical conditioning is the first step to block the apical migration of the junctional epithelium, which means clot and gingival margin stability along with less chance of recurrence and long-term predictability.
If you do not get either, never forget that you should always do good mechanical conditioning, as well as your ordinary root scraping and smoothing or polishing of the root surface with a fine-grain bur.
The critical point is to avoid surgery on a contaminated root surface and get rid of the smear layer.

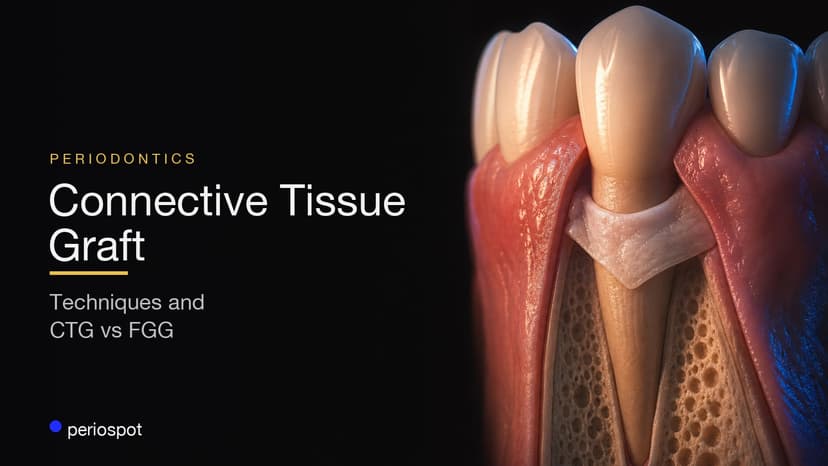
Step by step of Coronally Advanced Flap + Connective Tissue Graft
Step by step of Coronally Advanced Flap + Connective Tissue Graft
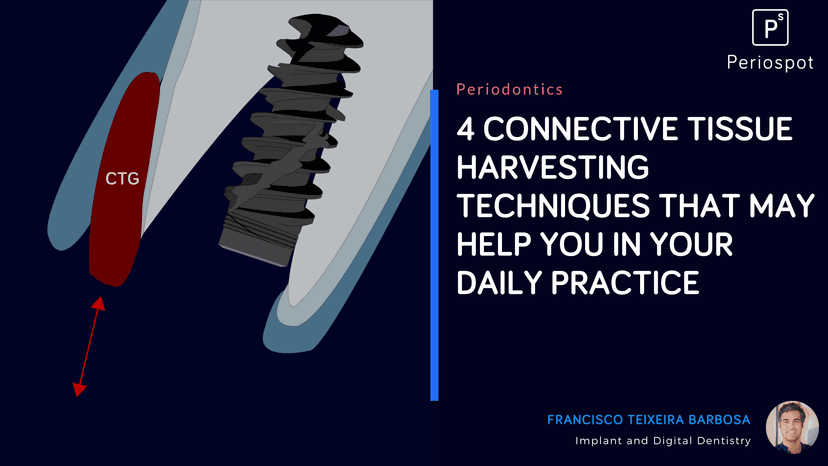
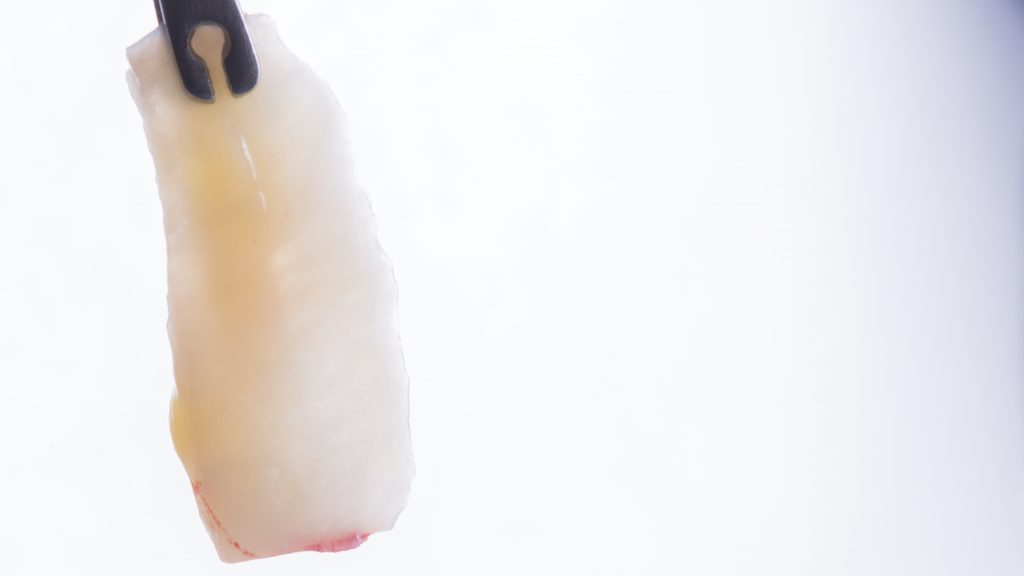
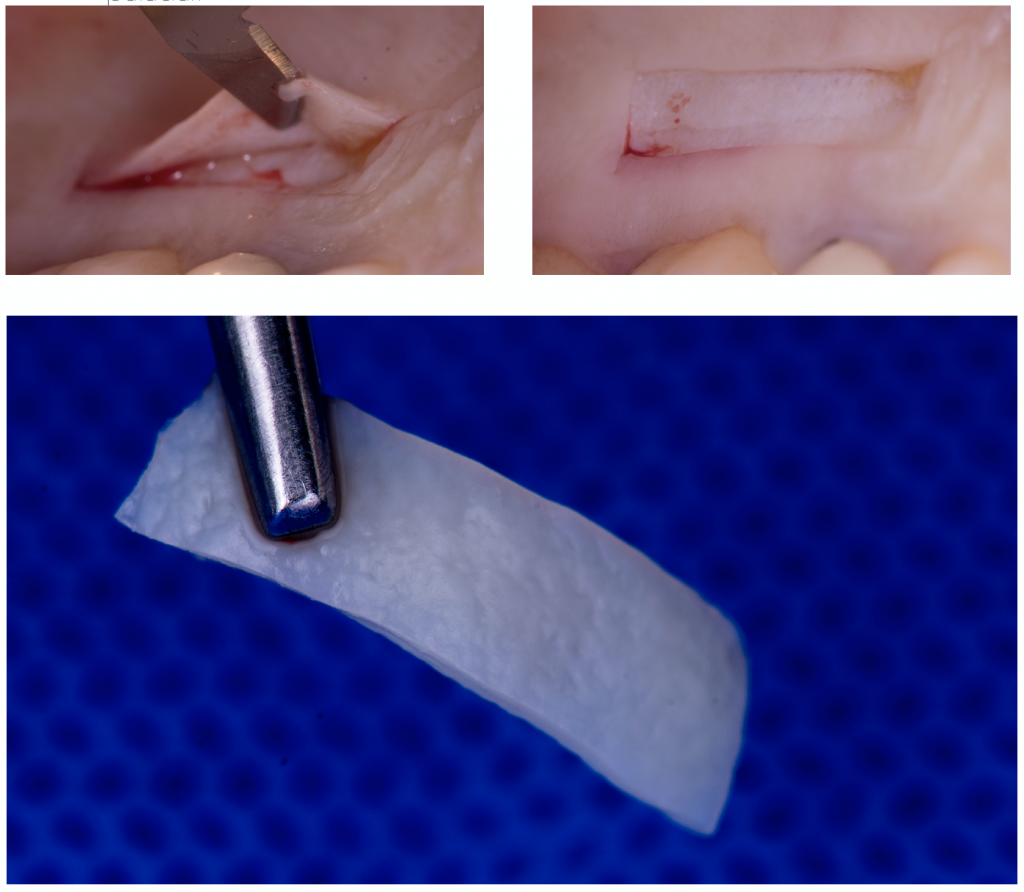
6. Use a de-epithelialized free gingival graft (DGG)
Harvesting the graft is one of the most stressful moments for a student due to the complications that can arise.
You have two techniques to take the graft: DGG and linear incision. The linear incision allows closure by first intention, resulting in favorable benefits for healing and post-operative pain. However, DGG has many advantages:
• Less surgical time, compared to taking the graft in a linear incision.
• Lower vascular risk as the arteries are in deeper planes, and with an DGG, you work closer to the surface.
• Better quality of connective tissue, since the fibers are better organized immediately after the epithelium, unlike deeper planes where you will find more adipose/glandular tissue.
• Direct vision – super important for your first graft from the palate.
Remember that the ideal thickness of the graft is between 0.6 mm and 1.5 mm max.
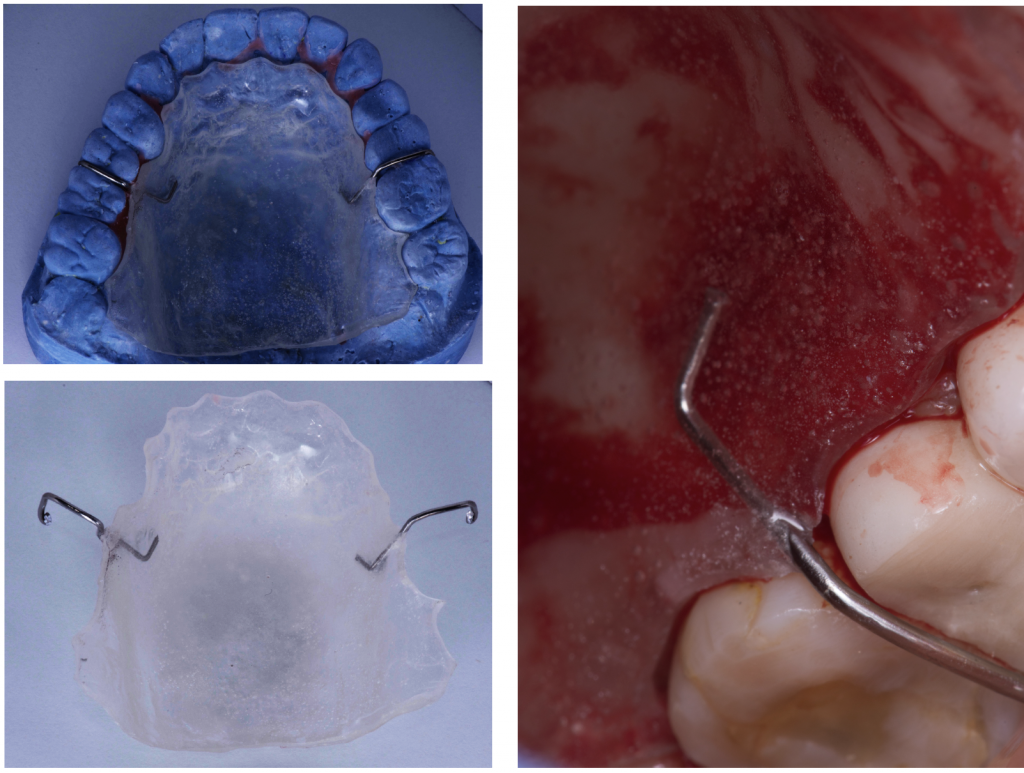
7. Make a protective stent for the palate.
It is recommended to prepare a protective plaque, as perhaps you cannot control the depth of your incision on the palate very much in the beginning and stabilizing the collagen sponges with cross stitches to control bleeding is very difficult; therefore, you can support yourself using a protective stent in your first grafts in order to save surgical time and avoid post-operative complications.
8. Suturing, start a new surgery.
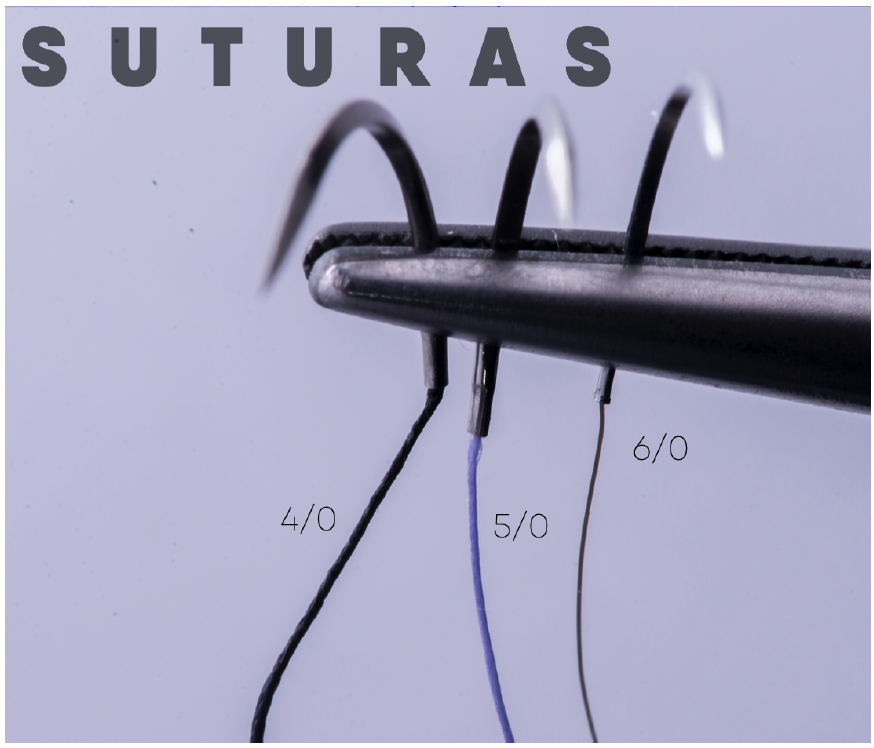
When the graft suture and flap suture begins, focus yourself as if you were going to start a new surgery, change gloves, and get organized again. It is very likely that you will find yourself a little exhausted, but remember that the suture greatly influences the success of the treatment; therefore, you must do it with patience and precision.
I suggest that you use a monofilament suture, 6/0, length no larger than 15 mm, and use reverse cutting needles.
Conclusion
"In the learning curve is the error" as many of my mentors would say, to boost my mood after necrosis, a complication, or a failure. This is true almost all the times and you should not be discouraged, however, it should not be used as an excuse for not improving.
When we finish a master degree we often believe that we possess the absolute truth about things.
I encourage you to open your mind and listen to other techniques and work philosophies.
Finally, you must be like a sponge that absorbs everything good for you at that moment. Looking for first-hand information, this means looking after the main references in an area and take out a course with them, if at the beginning you cannot for economic reasons, save money so you can later invest in your professional career.
Often I hear that “Being Professional is not having a degree, it is knowing what are doing ”.
Questionnaire
PerioSpot questionnaire
Test your knowledge
This questionnaire now runs inside PerioSpot. Your result is saved to your profile after sign in.
Open questionnaireRecommended Book: Mucogingival Esthetic Surgery
Recommended Class: Zucchelli Channel International
Zucchelli Channel International
Zucchelli Channel is an online educational video collection of Prof. Giovanni Zucchelli’s continuing education video courses, with LIVE commentary. Everything you need to know about soft tissue surgery in one complete course.
- Mucogingival Esthetic Surgery
- Periodontal Regeneration
- Peri-implant Soft Tissue Dehiscence Treatment
- Treatment of gingival recessions around implants
- Coverage of soft tissue dehiscence/dis-alignment around implants
- Increase in soft tissue thickness during delayed implant installation with immediate loading
- Increase in soft tissue thickness during immediate post-extraction implant with immediate loading
- Soft tissue augmentation procedure before implant installation: the “connective tissue platform technique”
- A soft tissue approach for implant placement in the area of tooth extraction for severe periodontal disease
Check Your Knowledge
Comments
0 totalLoading comments...
Previous
Alveolar Ridge Preservation- Presentation, animations, and illustrations
Next
Complications in Dental Implant Dentistry: Buccal Soft Tissue Dehiscences